


Below section explains how you can upload your game build in STOVE Studio.
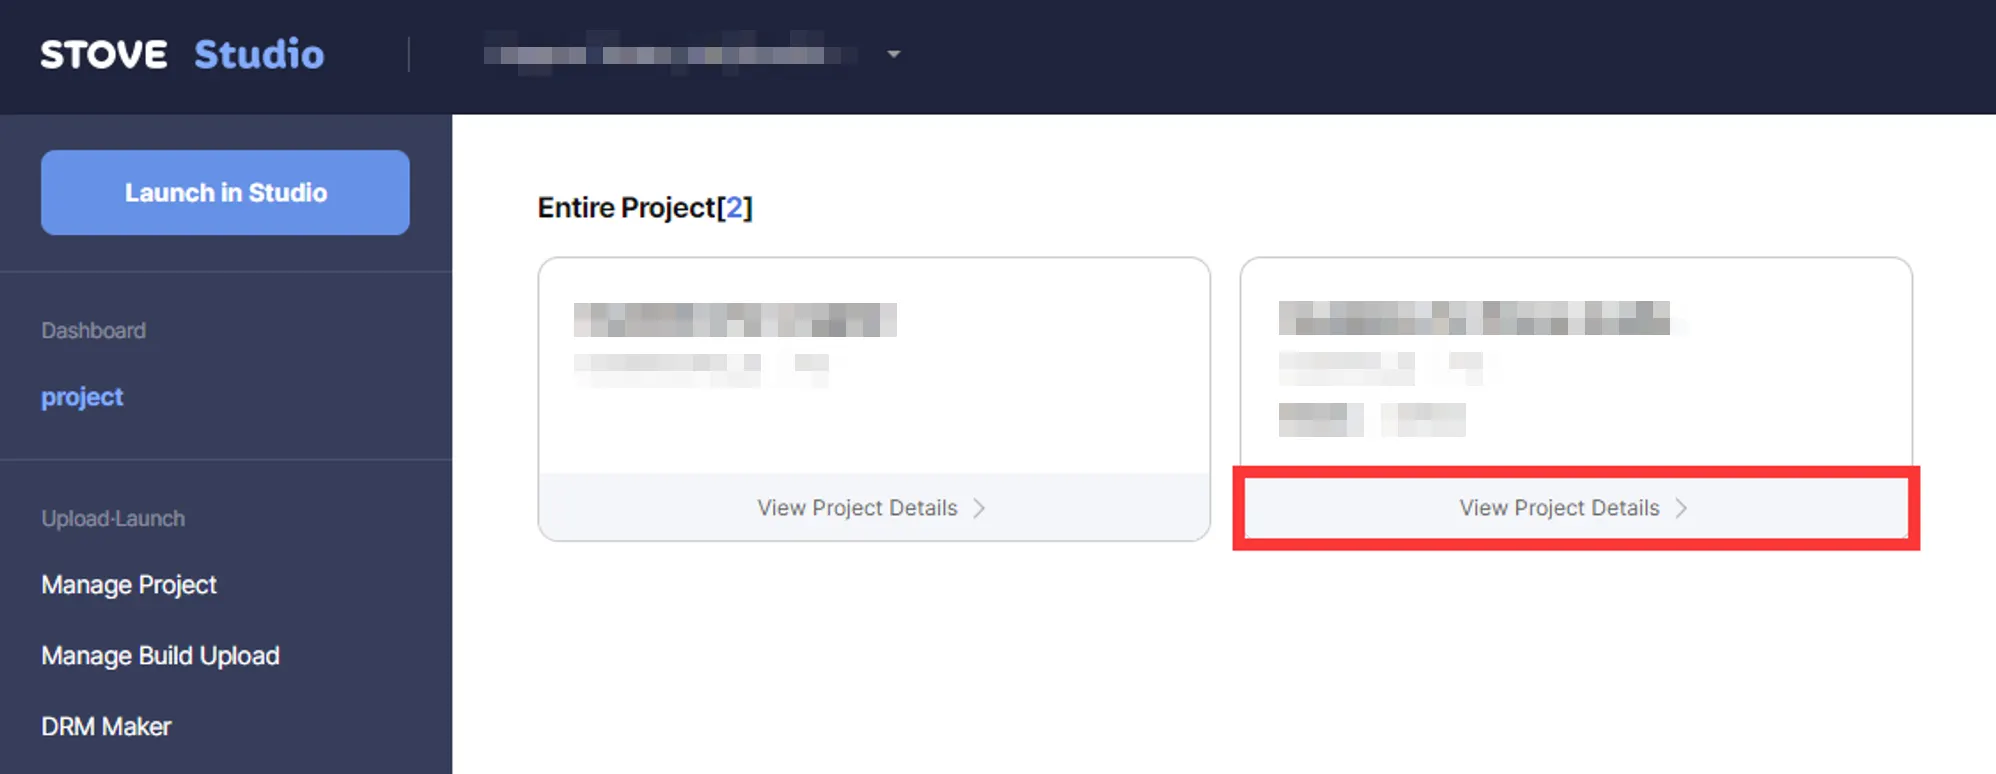
1. Go to Project Details
2. Click Manage Build Upload on the left, and Click Upload

3. If you do not have Build Uploader installed, you need to Install.

If you already have a Build Uploader installed, go to 4.

4. When running Uploader, a Pop-up will come like below.
You can enter the information, as given below. Those marked * have to be chosen or filled in.
After filling in, click Upload to upload the selected file.
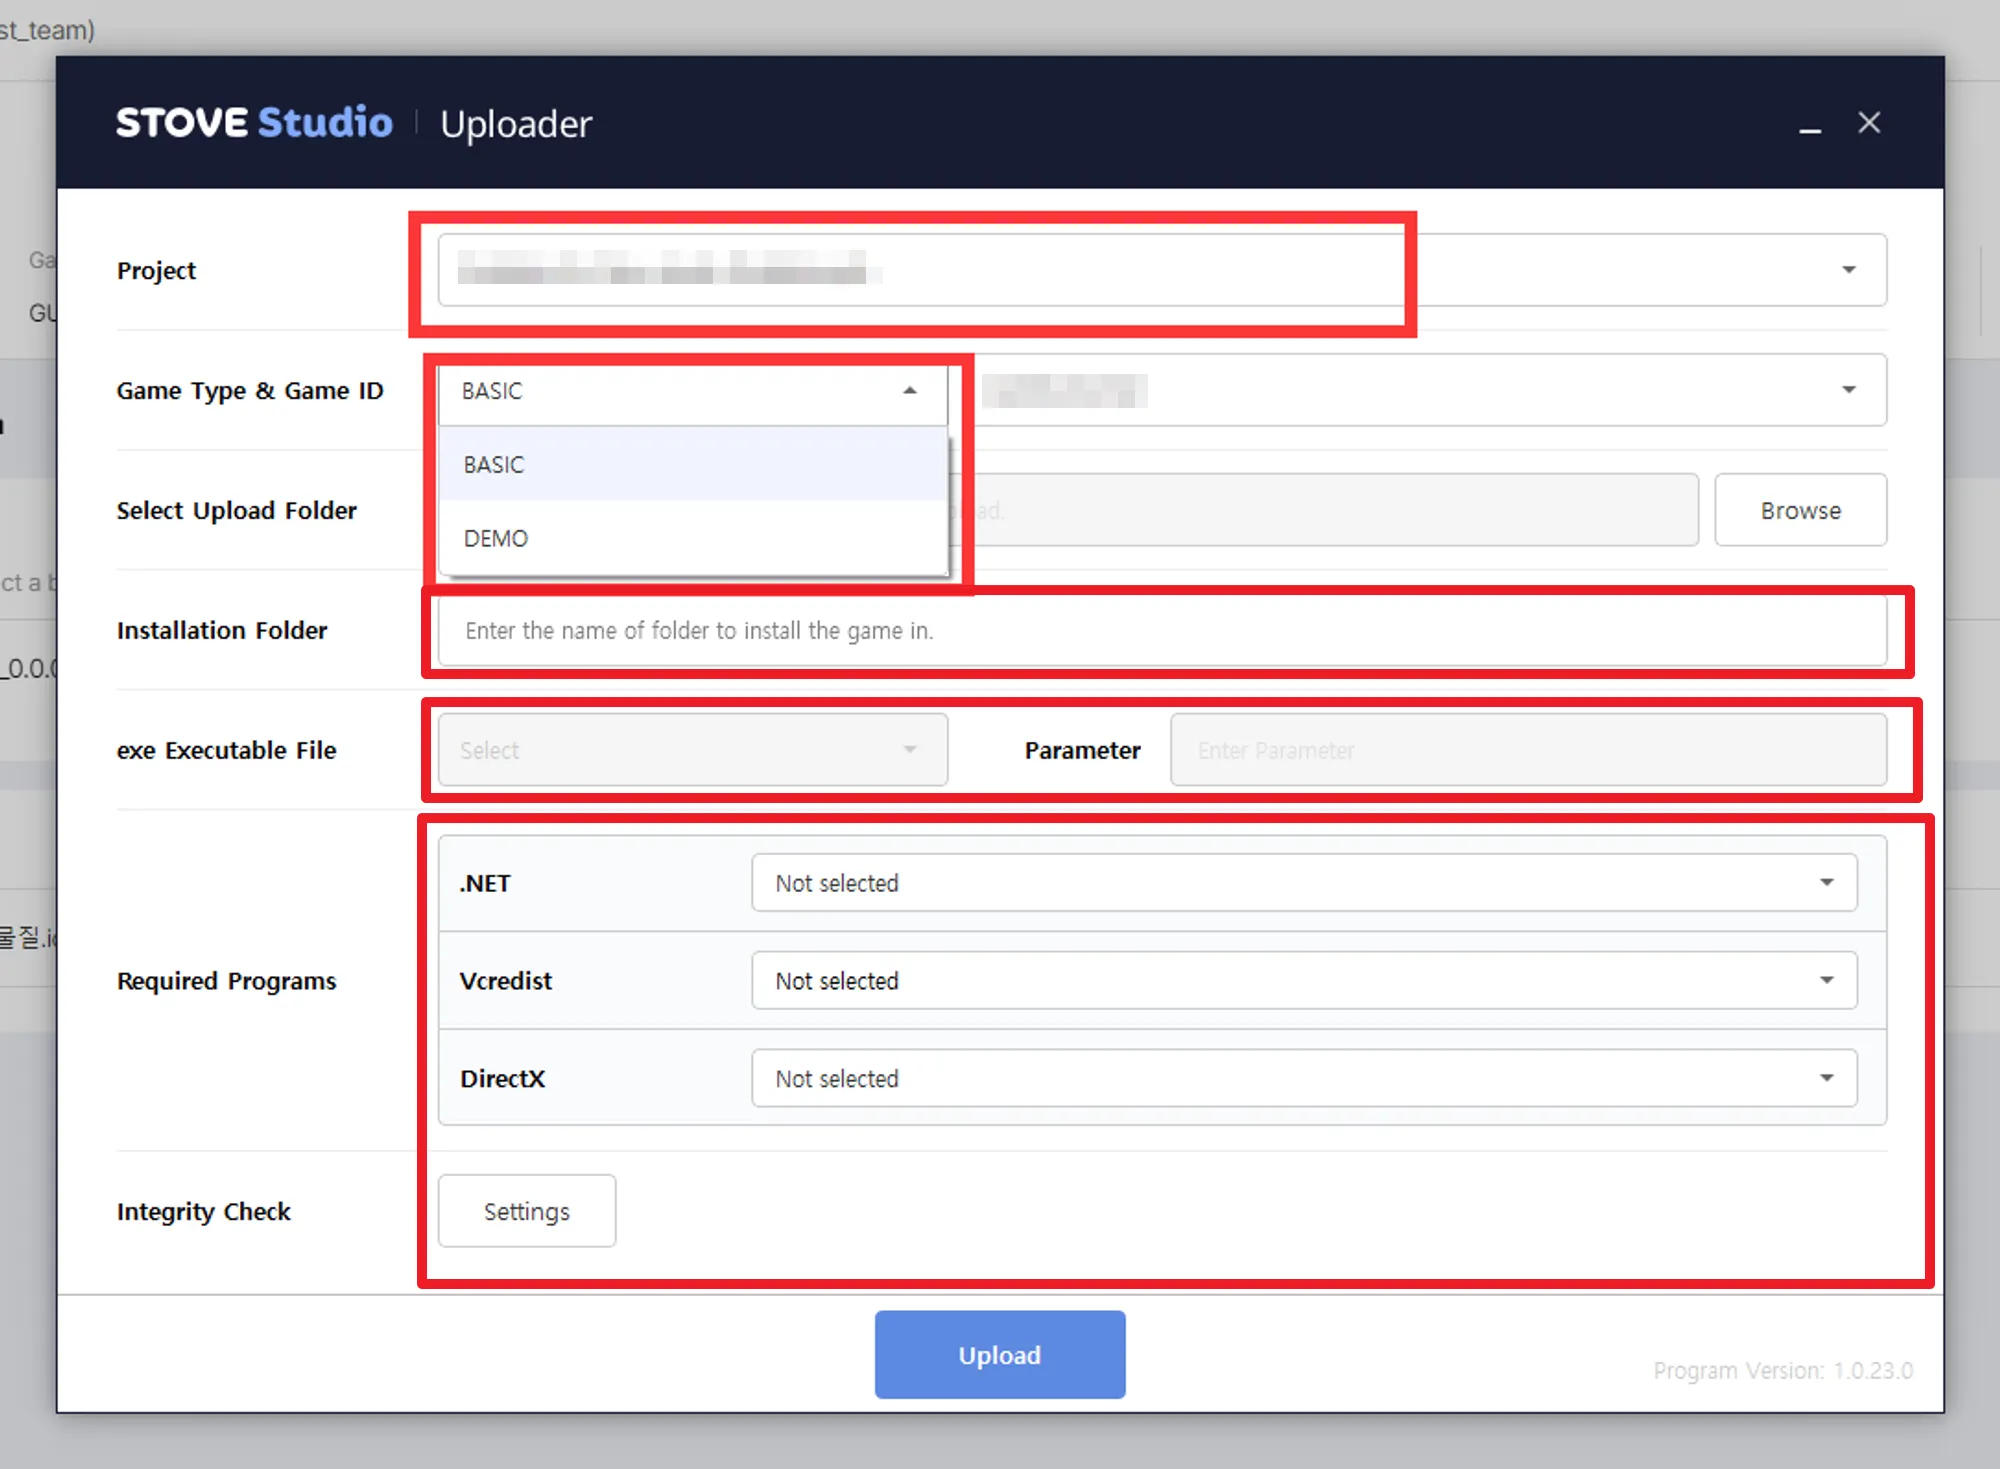
Project* | Select the project (to which you want to upload) |
Game Type & Game ID* | Select your game type, and your game ID |
Select Upload Folder* | Choose the folder which you want to upload.
(the folder must contain an executable .exe file) |
Installation Folder* | Enter the name of the folder, in whcih the game will be installed.
(only English characters are allowed) |
exe Executable File* | If you have multiple exe files in your build, make sure they are .exe files for running your game. |
Parameter | You can enter specific parameters for your exe file, ENTER AT YOUR OWN RISK |
Required Programs | Select which programs are required for running your game. |
Integrity Check | If you enable this option, the STOVE client will run a check on the game files whether there are any corrupted or missing files whenever the game launches. |
XDELTA Settings | This is related with games with Korean localization and subtitles at the same time.
We suggest you to not touch it. |
DRM Maker | DRM (Digital Rights Managermnet) Maker enables your build to have the most basic integration done.
It is used when your team do not have enough resources for SDK integration.
To find out more about DRM Maker, click here |
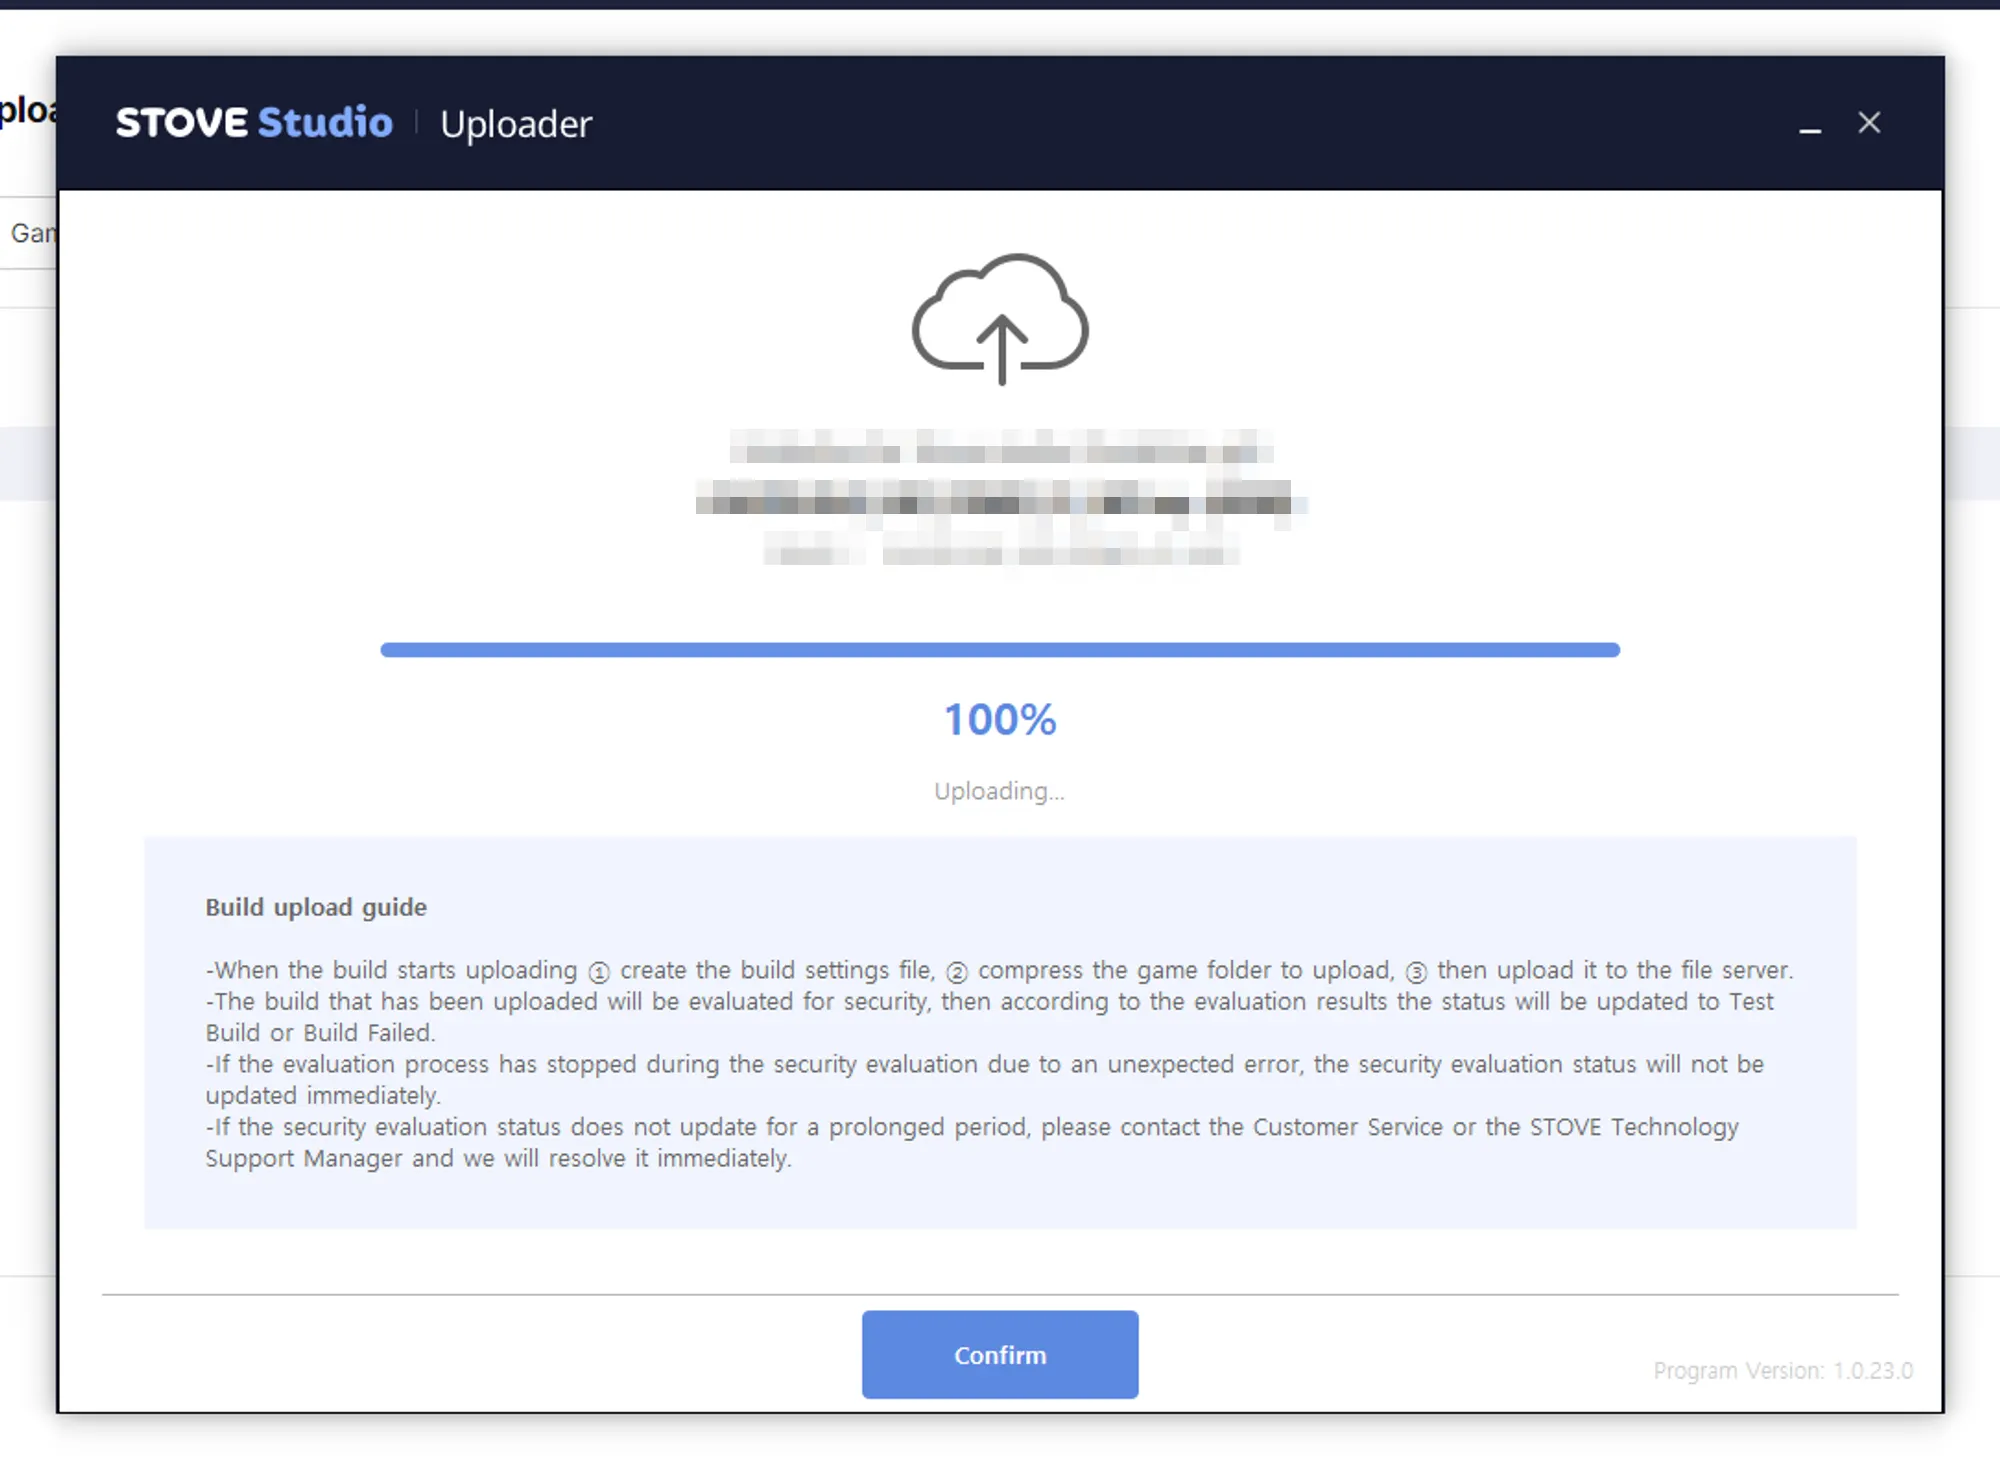
5. Your Build is Uploading!
If there are no issues with your entered information, the build will upload, if done (100%), click Confirm (see below)
6. Your Build is Uploaded.
Your build is now uploaded, if uploaded, you should see like below.
For every uploaded build, it will be displayed as Test Version (see below)
